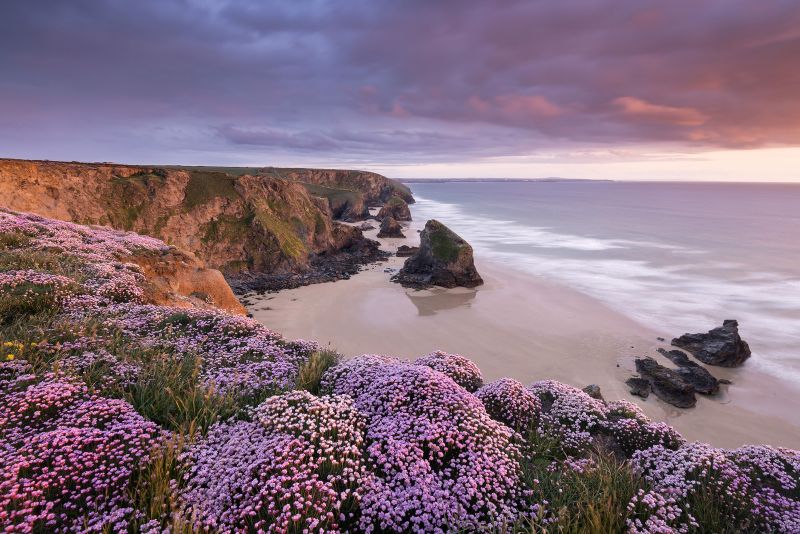
Focus on Foreground Interest
Posted on 29th January, 2021

Great landscape compositions typically feel balanced, harmonious and also possess an inherent feeling of depth. But just how do you generate a three-dimension look to your shots, when a photograph is two-dimensional? The answer is normally choice of perspective and the inclusion of relevant and interesting foreground objects.
There are many facets to a successful landscape image, but foreground choice is undoubtedly a key factor. It is fair to say that the inclusion or exclusion of foreground can make or break a landscape composition, so let's take a closer look at the role and significance of foreground choice.
Why do we need it?
Let's begin by making it very clear that you don’t always require foreground in your shots. I know that many photography books and magazines evangelise – or even obsess – about the importance of foreground, but it is not a prerequisite. Foreground only works if it appropriate and relevant – in other words, it needs to complement and enhance the view beyond. Simply plonking a big rock in your foreground will not enhance your photographs in any shape or form – in fact, it can do the opposite. Be aware that foreground can be a distraction or dominate a view. In other words, don’t include foreground for the sake of it. Instead, think carefully, trust your intuition, and only include foreground when it does the job you want it to do, which is to imply an almost lifelike feeling of depth, while providing a visual entry point to your composition. It should be the framework to produce a compelling and memorable landscape.
What subjects make good foreground?
Potentially, almost anything can provide foreground interest – the only qualification is that it is befitting and complementary to the scene unfolding beyond. For example, when shooting a seascape, you might decide to include a rocky outcrop, wavy-patterns in the sand, or a tidal pool as an entry point to the composition. Reflections, wildflowers, colour, subject motion, or the texture of a snow drift are just an example of relatively ordinary things that can provide extraordinary interest in the foreground of wide-reaching views. Your foreground doesn’t even have to be natural – manmade objects, like cobbles, steps, a jetty or walkway can lead the viewer’s eye into the frame. The choice is very much yours. Look for subjects or geometric shapes that will point or direct the eye into the frame. While a big foreground can prove very effective, a slightly more subtle approach is often better. Smaller, but visually interesting objects placed strategically in the foreground can provide all the interest required. For example, a single leaf, seashell or a frozen puddle might be just enough to add that significant extra layer of interest to your frame, while providing a natural entry point for the viewer’s eye to begin their journey. In regards to what will and won’t work in the foreground of a landscape photograph, instinct and experience often plays a leading role.
Your choice of viewpoint and perspective can have a significant effect. By using a wide-angle lens – in the region of 16-24mm – and getting very close to foreground objects, it is possible to distort and confuse perspective. By doing so, you can greatly exaggerate the size of nearby objects, making them appear larger, while things further away will look smaller and less significant. This visual illusion can be used to great effect, producing very striking, interesting results where the foreground subject is prominent and contributing significantly to the composition’s overall strength. A word of warning, though – you will rarely want the foreground to actually dominate the shot. If it is too large and looming, the viewer’s eye will never travel effectively through the image-space and fully explore the scene beyond.
Depth of field and focusing
When using foreground interest, you will likely desire everything within the frame – from front-to-back – to be acceptably sharp. To do this, select a small aperture to generate a sufficiently large depth of field. Although small f/stops, like f/22, will extend depth of field, they also suffer the effects of diffraction. Instead, f/11 is a good starting point, offering a large zone of focus, yet remaining relatively diffraction free. Depth of field extends roughly one-third in front of your point of focus and two-thirds beyond. Therefore, if you focus too near or too far into the frame, you are wasting valuable depth of field. In many situations, focusing approximately a third-way into the composition is an effective method. However, when including nearby objects in your foreground that form an integral part of the composition, you may find you have to be more precise with your focusing and calculate the hyperfocal point (the distance that will maximize depth of field for any given aperture and focal length combination). Charts and apps are available online. Another method is ‘double distance focusing’. This is when you identify the closest point you want to record sharply, calculate this distance, and then focus at twice that distance away. For example, if your foreground interest is 2meters away, focus on 4meters. This is a simple, but tried and tested method. If your foreground is very close, consider focus stacking to extend depth of field instead. These are all focusing techniques we outline in more detail in From Dawn to Dusk: Mastering the Light in Landscape Photography.
Of course, foreground interest isn’t the only way of implying depth in your landscapes – lead-in lines, natural frames, and the use of light and colour are all alternative methods. We will look at these options in more depth in a future blog post.


